Blender Tutorials
Tips and Tutorials for Blending with Cycles
~~~~~~~~~~~~~~~~~~~~~~~~~~~~~~~~~~~~~~~~~~~~~~~
[Blender 2.65] How to create Invisible Mesh Lights
[Blender 2.65] Cycles Tutorial - How to create invisible Mesh Lights
Prerequisite: This article assumes a basic knowledge of Blender's Cycles - It does not give an introduction to Cycles - There are plenty of very good tutorials available for that.
Cycles Render makes it possible to get mesh based light - something which- was not previously possible in Blender 3d - one had to live with the lamps - namely the spot, area, point, and sun Lamps.
Now it is possible to make any mesh - any object (cube, sphere, plane etc.) a light source by using the Emission Shader for the material applied to the object. However, unlike the classic lamps, which are very much available in Cycles now, the mesh light sources are visible to camera.
Sometimes, a visible light source in the render could be exactly what is required. And sometimes some positional adjustments would be possible to avoid the unwanted light source from appearing in the render.
However, more than often, lights are required to just light the scene, and remain invisible from the eyes of the camera.
There are two ways this can be achieved in cycles.
One. In properties window, go to the Object Panel and in the Ray Visibility Sub Panel, deselect Camera. This will make the object itself invisible. Note that along with the light this object emits in the scene, any reflections or shadows it casts will be still visible.
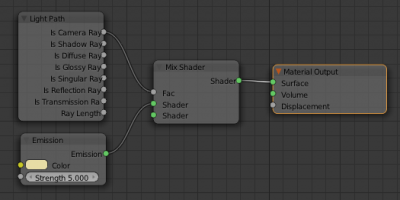
Two. In the Node Editor Window, go to material nodes. Hit Shift+A and go to Input to add a 'Light Path' Node. Hit Shift+A again, go to Shader, and add a Mix Shader Node. Connect the Lightpath node's 'Is Camera Ray' socket to "fac" value of Mix Shader node. Connect Emission Shader's output to first input socket of Mix Shader. This would imply that the material would emit light for every ray except the camera ray.
If the 'Rendered' as view Port shading in the 3d viewport is selected for the live preview, you would notice that the object with the material we are configuring has become black. That's because it does not have any material to show off to the camera.
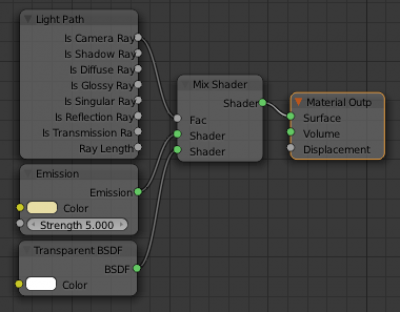
Let's make it transparent to the eye of the camera. For doing that, insert a new Transparent Shader node, (Shift+A -> Input ->Shader -> Transparent). Now Connect the output of this shader to the second input of the mix shader node.
The light mesh will be invisible to the camera, however, it would still cast a reflection and shadow.

The method Two above is better if you would require many of these invisible lights for your scene. As long as the same color and strength of Emission are good enough, use the material as is, otherwise, duplicate the material and make the required changes.
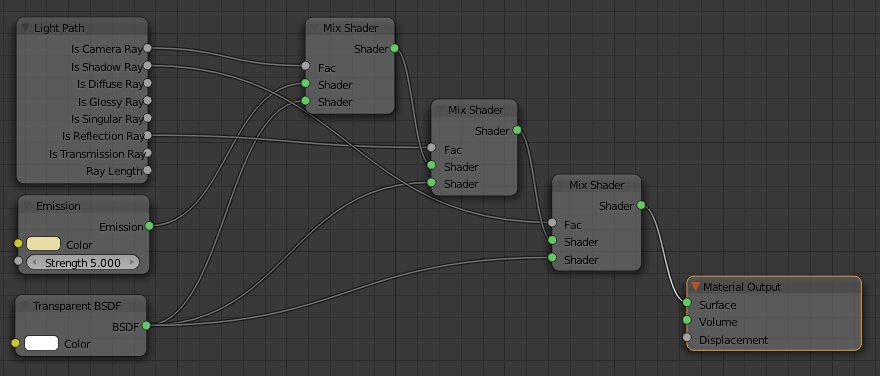
Advanced: The light mesh's shadow and reflection can be made invisible by adding more mix nodes and inserting the 'Is Reflection Ray' and 'Is Shadow Ray' to the fac values of these nodes as shown in the figure. Alternatively, deselect the Glossy and Shadow checkboxes in Ray Visibility Section of Object Properties.
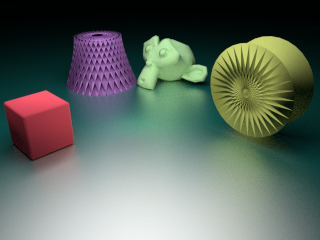
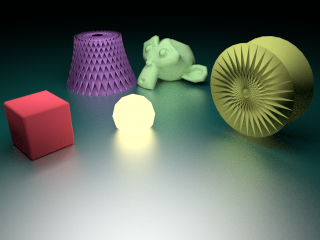
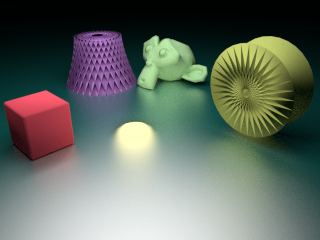
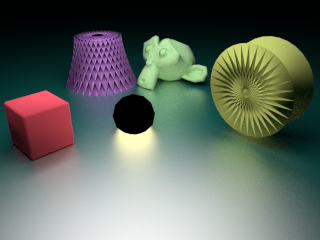
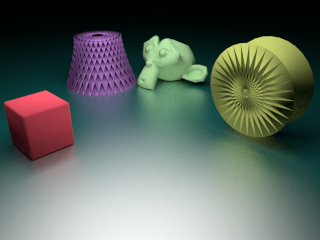
Above is the scene with Mesh Light invisible, compare it with below - Mesh light deleted.
Happy Blending, Merry Cycles.
Sponsored